Securing applications with better user authorization
Possibilities for a security-minded user flow through an application.
Applications have changed significantly over the past several years. The power of the modern web browser is unbelievable, we can write robust applications using awesome frameworks shifting a lot of logic and concerns to the client-side. As we continue to focus on the user experience, has application security also kept up? Here we’ll dive into application security from both the client and server and find ways to enhance the user experience while rethinking security.
Authentication and authorization
Anytime application security comes up in discussion, two terms are tossed around in conversation a lot, often leading to some confusion — authentication and authorization. I have a couple simple phrases to help identify these two terms.
- Authentication is when the user supplies some information to a system that can be validated by the system. This is usually involves multiple checks, along with a set of credentials like a username and password. Through authentication we are trying to determine ‘who are you?’
- Authorization is also interested in who the user is, but is used to determine what functions, actions, data, or other parts of an application the user has access. Authorization answers the question ‘what can you do?’ It’s not a requirement for a user that’s been authenticated to also be authorized. An unauthenticated user may have some access to an application, although usually in a very limited capacity.
The role of JSON Web Tokens
When managing user authentication and authorization between client and server, or server to server, a preferred option is token-based authorization. One popular solution JSON Web Tokens (JWT) to provide a stateless communication mechanism. Simply put, JWTs are just JSON that is cryptographically signed and able to be verified and validated by the recipient. Because they are just JSON we can pass really any information we want through a JWT. Well, almost any information.
JSON Web Tokens are digitally signed, not encrypted which means anyone can have access to the information held within a JWT. Therefore, it’s important to carefully consider the type of data being stored and passed through your JWTs.
Here’s an example of a payload you might consider:
      {
   “sub”: “1234567890”,
   “admin”: true,
   “name”: “Jim Doe”,
   “email”: “jim@email.com”,
   “iat”: 1516239022,
   “exp”: 1516240022,
   “uid: “573hdk”,
   “roles”: [
      “manager”,
      “superAdmin”
   ]
}
This contains only information that is needed by either the client or the server. No sensitive information like addresses, social security numbers, etc. are being shared. A slightly modified version of the same JWT payload might look like this:
      {
   “sub”: “1234567890”,
   “admin”: true,
   …
   “groups”: [
      6,
      42,
      67
   ]
}
The main difference here is that instead of an array of strings called “roles” we have an array of numbers called “groups”. This does a few things for us:
- First, it obscures some of the security within our application to an outside user because we are storing only the ID for a group instead of the full name.
- Second, we are pre-fetching information that might be used in a query later in the application. By doing this we can eliminate additional queries for requests as long as the JWT is still valid.
Security-minded user flow

So what might the flow of a user through an application look like with security in mind? When the user opens the application they are first authorized as an unauthenticated user. This might be just a login screen or possibly a limited set of functionality. Next the user authenticates and the server successfully validates that the user is who they say they are. From there, the server generates a JWT and sends it back to the client application to store. Once the client application has some information about the user, preferably from the JWT, it starts to ‘turn on’ functionality for that user. Assuming the user continues to be active in the application, the client will continue making and processing requests to the server, passing the JWT to authorize each request.
Most modern architectures split the client application — like a single page application (SPA) for example — and a server into separate components that communicate over the web. Each component has a role in securing the application. Here we’ll focus on just the client-side aspects of securing our applications but it’s extremely important that the server also validates and verifies requests. Let’s dive into ways that we can determine user authorization based on who they are.
‘Role-based’ authorization
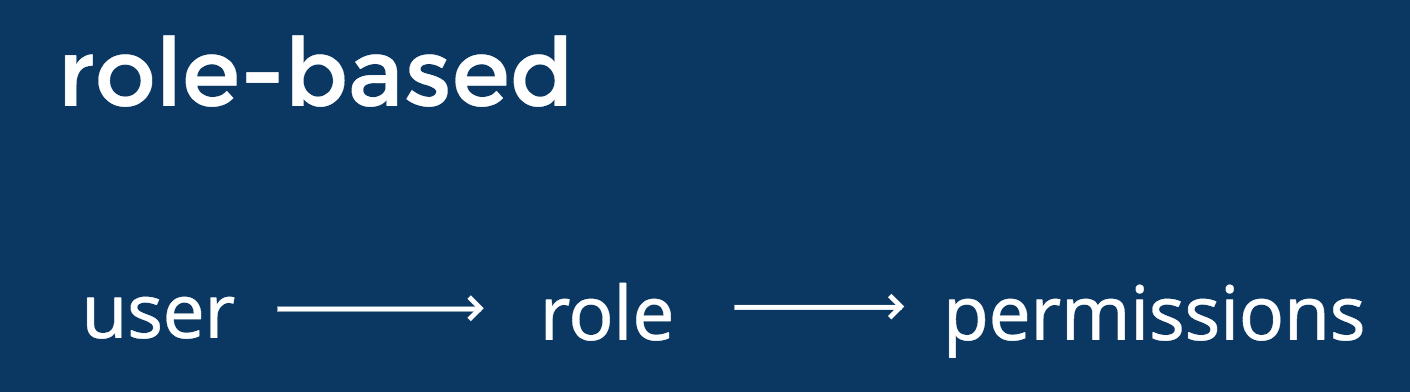
First, we’ll take a look at role-based authorization. This is when a user is assigned to a role or roles that determine what access they should have within the application. This access could be to pages, components, functionality, or data within the application. A role-based approach to authorization usually aligns with an organization’s hierarchy. An example group of roles might be ‘Manager’, ‘User’, and ‘Admin’. These roles, when assigned to various users of an application, grant some level of access to functionality and data.
With role-based authorization the client application can grant access to users based on the roles which they’re a member.
‘Claims-based’ authorization

The second common approach to authorization provides more granular control over the authorized functionality for a user. This approach is considered a ‘claims-based’ authorization. Here we’re claiming that a user can take actions like ‘canEditProducts’. This claim provides a level of authorization that is tied to the user and is not specific to a role within the application or organization. A claim can also be used to modify the user experience on the client application by enabling or disabling functionality for a user.
‘Attribute-based’ authorization

As applications grow with more features and user types, roles-based and claims-based authorization models start to become limiting. One solution worth exploring is an ‘attribute-based’ approach to authorization. This is where a policy is created to determine what authorization a user has within an application based on some condition — the policy can be anything. For example, let’s say that based on a business rule, application users are not allowed to edit product descriptions prior to 8am on the weekend. Seems a little extreme perhaps, but some businesses might need that type of restriction. Here are a couple more policies that might apply:
- All users in [specific security group] can only view location information.
- All users in the development environment have admin access.
These policies will need to fit into a pattern for your application, but once that pattern is defined, logic can easily be used to make determinations about a users access.

The role of CRUD
The attribute-based authorization model is not something that you would want to implement inside a client application because of the sheer amount of logic that would need to exist. To simplify the management of this approach on the client-side, consider giving each component in the application a unique name that can then be linked to any number of policies. That component name can then be used to determine access levels for a user. To track those access levels, use the Create, Read, Update, and Delete (CRUD) paradigm, meaning that each unique component will receive a CRUD object for each user, generated when they login. This can give the application a very dynamic way to authorize users.
For example, an application route authorization can have a simple check like this:
Authorization Service
// API Response
      const routeAuth = [..{
 “name”: “users”,
 “create”: true,
 “read”: true,
 “update”: true,
 “delete”: true
 }];
// Authorization Service
      let getRouteAuth = (route: string) => {

 // Find a matching route authorization for provided route
 const auth = routeAuth.find((obj) => {
   return obj.name === route; });

 if (auth){
    return auth.read;
 }
   return false;

}
Assuming the route requires the user to be authenticated the next step is for the client to ask the server for the route authorizations for that user for the current time period. The server will respond with an array of objects. Each object in the array represents a different route within the client application. The route is identified by its name and should be unique to the application. Along with the route name are boolean values for each CRUD permission. Giving us an object like this:
      {
   “name”: “users”,
   “create”: true,
   “read”: true,
   “update”: true,
   “delete”: true
}
The same concept can be applied to each component. Here we have a simple form for inputting and updating a single user. The CRUD pattern can be applied here as well.
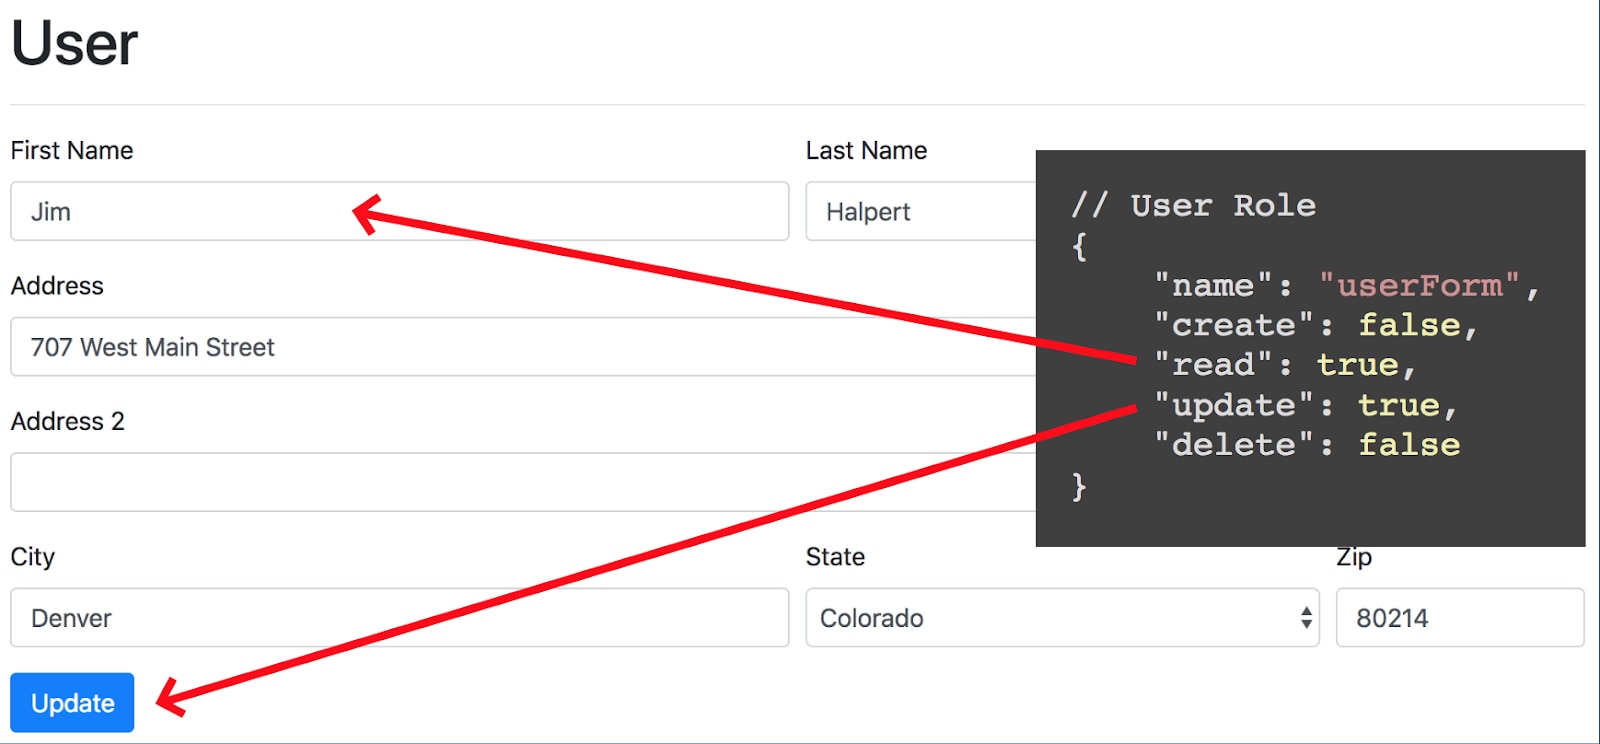
Similarly if a user has restricted set of permissions for the same form component the user experience is modified to reflect the access for a user.

Based on the users authorization level during the session the client component can turn-on or turn-off functionality based on information provided by the server. The client application doesn’t need to be concerned with complicated business logic, rules, roles, or policies.
This approach is much simpler to manage on the client-side and gives the application fine-grained control over what a user is, and is not, allowed to do at any time.
Putting it all together
Moving the authorization to the routes and components level allows the user interface to be as unaware as possible when it comes to authorizing a user. The UI will use whatever information it receives from the API to manage the setup of the application. No business logic is performed on the UI related to authorization. Only functional logic, i.e. if this user has access to this route, allow the user to access, if they do not have access, take every action to prevent the user from accessing a route.


